
Introduction: A Slice of Basque Heaven
Have you ever tasted a dessert that transports you to another world with just one bite? San Sebastián cheesecake, or Basque Burnt Cheesecake, is one such indulgence. This dessert, originating from the scenic city of San Sebastián in Spain’s Basque Country, has captured the hearts of food enthusiasts worldwide. Its unique burnt exterior, creamy center, and rustic charm make it stand out from traditional cheesecakes.
The cheesecake’s popularity surged in the late 1990s when Chef Santiago Rivera introduced it at his restaurant, La Viña. What started as a humble experiment has now become a global culinary sensation, beloved for its unexpected balance of flavors and textures. In this article, we’ll explore everything that makes San Sebastián cheesecake so special—its origins, its creation process, and how you can recreate it in your own kitchen.
What Makes San Sebastián Cheesecake Special?
A Delicious History Behind the Dessert
San Sebastián cheesecake is a modern culinary marvel with deep roots in Basque tradition. It was created in 1990 by Chef Santiago Rivera at La Viña, a renowned restaurant located in the heart of San Sebastián. Rivera’s goal was simple: to create a cheesecake unlike any other. The result was a decadent creation with a scorched top, creamy center, and a rustic aesthetic that immediately captivated patrons and food critics alike.
Though it may seem unconventional, the scorched top was intentional. Chef Rivera wanted the cheesecake to have a caramelized finish, adding a hint of bitterness to complement the creamy, tangy interior. This distinctive feature has now become its hallmark, and it’s what sets it apart from traditional cheesecakes.
Unconventional Preparation and Baking Method
One of the most remarkable features of San Sebastián cheesecake is its unique preparation method. Unlike traditional cheesecakes, which are often meticulously smoothed into a perfect shape, this cheesecake is baked at a high temperature, resulting in a dark, almost burnt exterior. This appearance, however, is far from a mistake—it’s a key part of the dessert’s allure.
The batter is poured into a parchment-lined pan, and the cake is baked quickly at a high temperature. This creates the dark, caramelized crust, while the interior remains soft, custard-like, and slightly tangy. The beauty of the cheesecake lies in its imperfections—the cracked, uneven top, and the jiggly, creamy center, make it a true work of art.
Essential Ingredients for a Perfect San Sebastián Cheesecake
Creating the perfect San Sebastián cheesecake starts with using the right ingredients. The charm of this dessert is found in its pure elegance and uncomplicated nature. You don’t need exotic ingredients to create the magic—it’s all about the quality of what you use. Here’s a list of the key ingredients you’ll need to craft your cheesecake masterpiece:
What You’ll Need
- Cream Cheese: The foundation of any cheesecake, providing the rich, creamy texture.
- Liquid Cream: Adds smoothness and contributes to the decadent feel of the cheesecake.
- Sugar: It adds a touch of sweetness, perfectly complementing the creamy tang of the cheesecake.
- Eggs: Help bind the ingredients together and create the cheesecake’s silky texture.
- Vanilla Sachet: A splash of vanilla adds a comforting, familiar flavor to the dessert.
- Lemon Peels: Lemon adds a refreshing tang to balance the richness.
- Flour: Used to slightly thicken the batter and provide structure to the cheesecake.
Table of Ingredients:
| Ingredient | Quantity |
|---|---|
| Cream Cheese | 650g |
| Liquid Cream | 200ml |
| Sugar | 130g |
| Eggs | 5 |
| Vanilla Sachet | 1 |
| Lemon Peels | A few |
| Flour | 2 tbsp |
Step-by-Step Guide to Making San Sebastián Cheesecake
Preparation and Baking Instructions
With all your ingredients gathered, let’s jump into the exciting part—creating this delectable dessert from scratch. Making San Sebastián cheesecake is easy, even for beginners, and with just a few simple steps, you can create this indulgent dessert.
Step 1: Line the Pan
Start by lining a 20cm (8-inch) pan with two layers of parchment paper. Make sure the paper extends at least 5cm (2 inches) above the edge of the pan. This extra height ensures that the cheesecake has room to puff up while baking without any risk of overflow.
Tip: A springform pan is ideal for this recipe, as it makes unmolding the cheesecake easier once it’s cooled. However, any cake pan will work perfectly, whether it has a removable bottom or not.
Step 2: Preheat the Oven
Set your oven to 200°C (390°F) and preheat for at least 20 minutes. For even better results, aim for a 40-minute preheat. A well-preheated oven ensures your cheesecake gets that beautiful, scorched top.
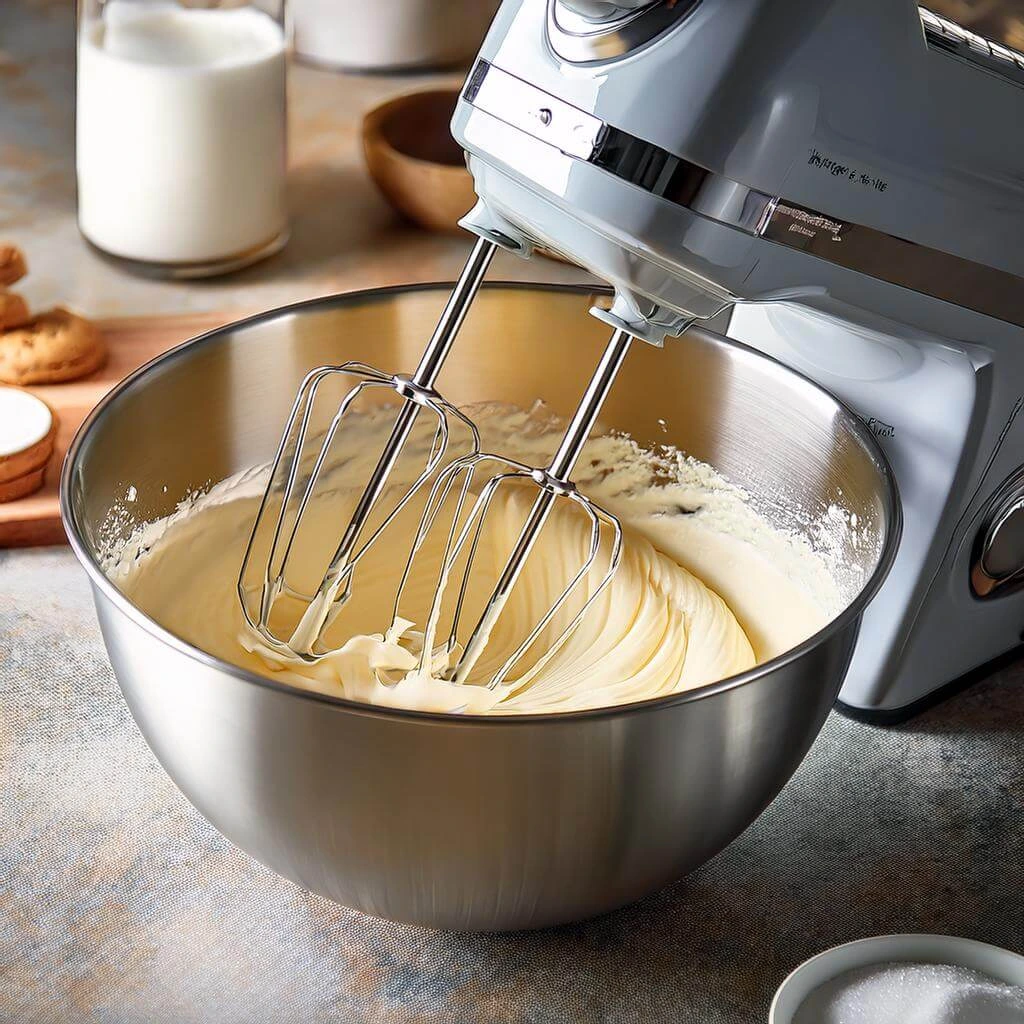
Step 3: Whisk the Cream Cheese
Add the cream cheese and sugar into the bowl of your stand mixer and begin mixing them together. Using a medium-low speed, whip them together until the sugar dissolves and the cream cheese becomes smooth and creamy.
Step 4: Blend in the Eggs
Crack in the eggs individually, ensuring each one is fully blended into the mixture before adding the next. This step ensures a smooth batter and a silky texture for your cheesecake.

Step 5: Add the Cream and Vanilla
Pour in the room-temperature cream, a splash of vanilla, and a few strips of fresh lemon peel. Mix on low speed until the batter is smooth and silky. Scrape down the sides and bottom of the bowl to ensure all ingredients are fully blended.
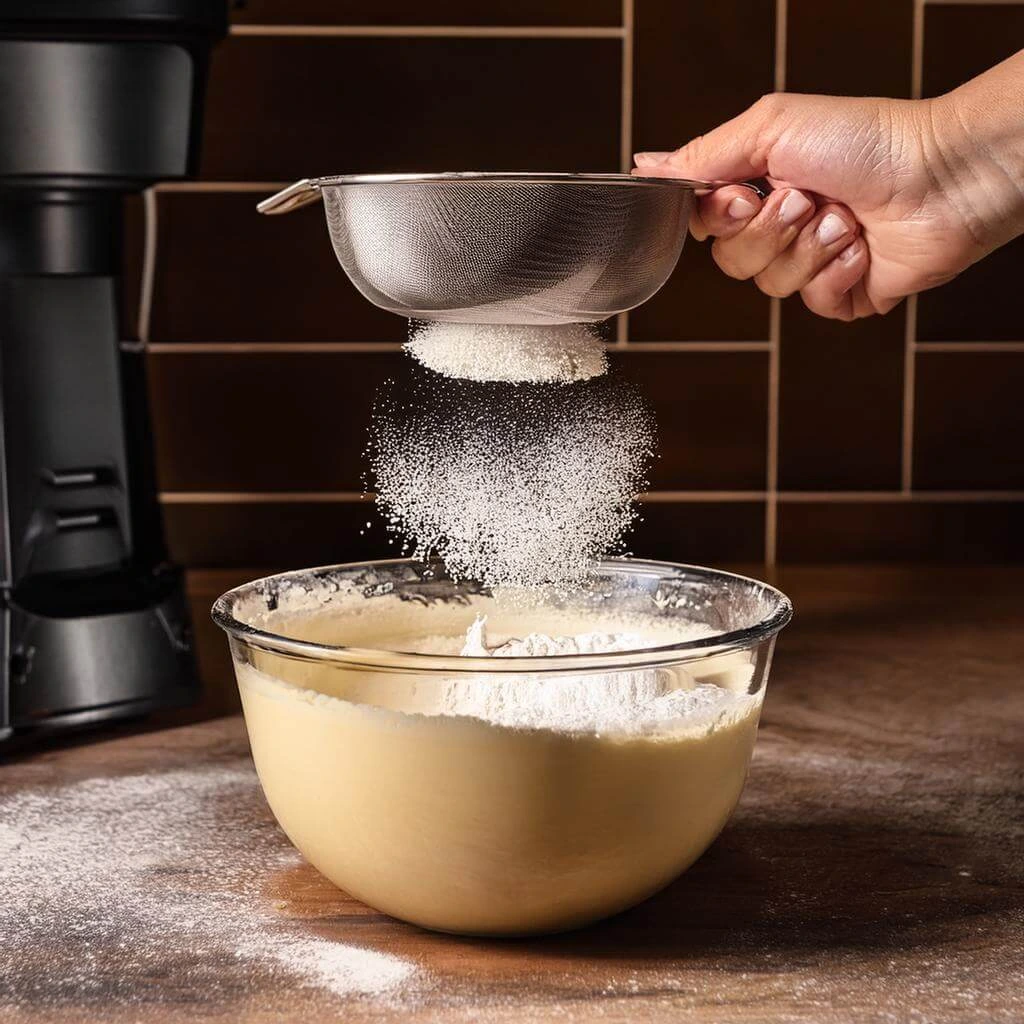
Step 6: Add the Flour
Sift the flour into the batter to eliminate any lumps. Mix on low speed until just combined. Be careful not to over-mix, as you want a smooth, velvety batter.
Step 7: Pour and Bake
Transfer the batter into the prepared pan, then use an offset spatula to evenly level the surface. Tap the pan gently on the counter to settle the batter and eliminate air bubbles. Bake for 45-55 minutes, until the top is a rich, dark brown, and the edges are firm, but the center still has a slight jiggle.
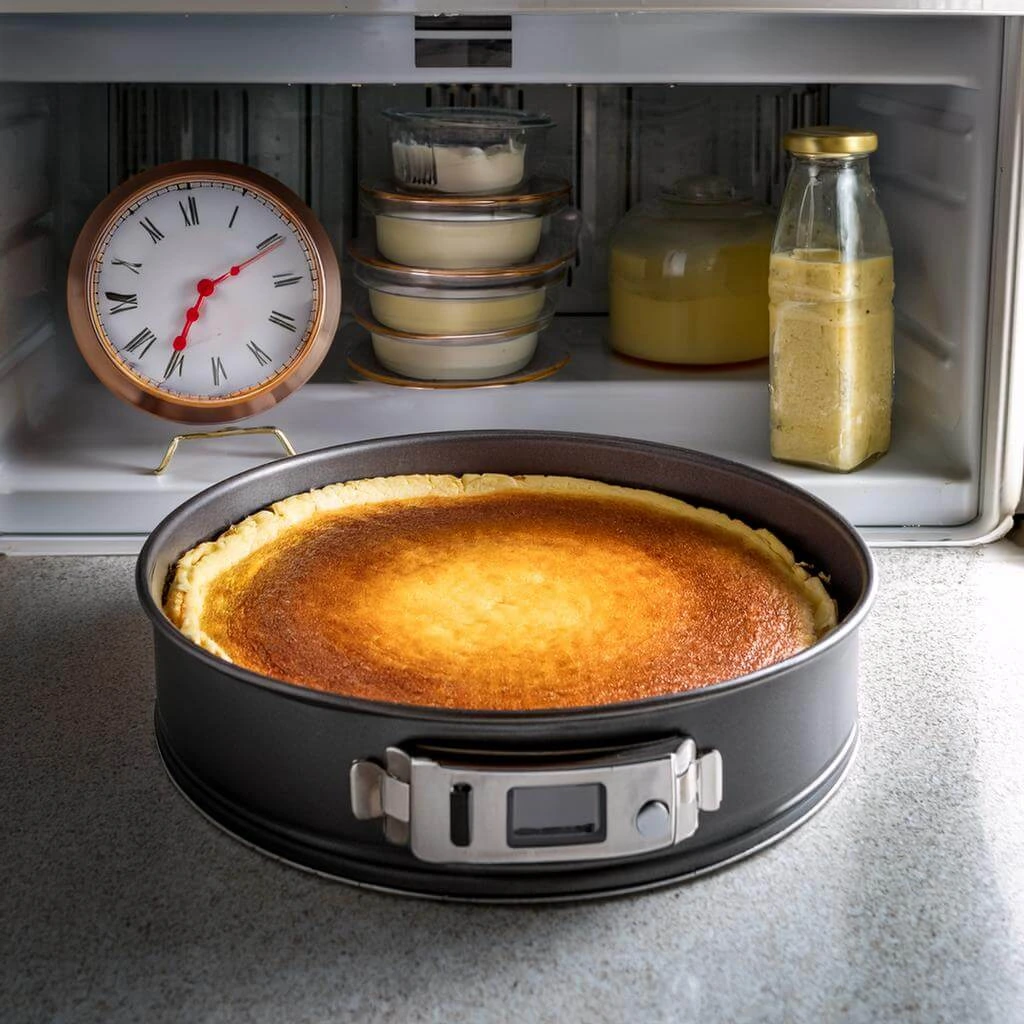
Step 8: Cool and Freeze
Once baked, remove the cheesecake from the oven and let it cool completely in the pan at room temperature. This cooling process allows the cheesecake to deflate and settle. Place it in the freezer for at least six hours to fully set before serving.
Pro Tips for Perfecting Your Cheesecake
- Room Temperature Ingredients: Allow all your ingredients, particularly the cream cheese and eggs, to come to room temperature before starting. This will help achieve a smoother, lump-free batter.
- Prevent Overflow: Use extra parchment paper to prevent the cheesecake from overflowing as it puffs up during baking.
- Broil for Extra Browning: If the top of your cheesecake isn’t as dark as you’d like, pop it under the broiler for a couple of minutes for that perfect scorched look.
- Cooling: Let the cheesecake cool completely in the pan before removing it to avoid any cracks or mishaps.
How to Serve and Decorate Your San Sebastián Cheesecake
San Sebastián cheesecake isn’t just delicious; it’s also a feast for the eyes. Its rustic, burnt top and creamy center make it as beautiful as it is decadent.
Serving Suggestions
- Room Temperature vs Chilled: San Sebastián cheesecake can be enjoyed both at room temperature and chilled. Some people prefer it chilled to allow the center to firm up slightly, while others enjoy the rich creaminess at room temperature.
- Pairing Ideas: While the cheesecake is stunning on its own, you can also pair it with seasonal fruits like berries, a dollop of whipped cream, or a drizzle of honey for added richness.
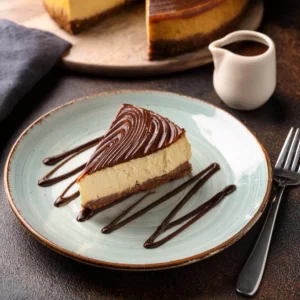
Decorative Touches
For an extra touch of decadence, serve your San Sebastián cheesecake with a homemade chocolate sauce:
Table for Chocolate Sauce Ingredients:
| Ingredient | Quantity |
|---|---|
| Chocolate (Nestlé or Nutella)Nutella ChocolateLovers | 250g |
| Liquid Cream | 200ml |
To make the sauce, simply heat the chocolate and cream in a pot over low heat, stirring continuously until the mixture begins to boil. Once it’s at a boil, remove it from the heat and transfer to a serving dish. Let it cool in the refrigerator before drizzling over your cheesecake.
Nutritional Information
Nutrition Breakdown of San Sebastián Cheesecake
This dessert is indulgent but can be enjoyed in moderation. Here’s a typical nutritional breakdown per serving:
Nutritional Table:
| Nutrient | Per Serving |
|---|---|
| Calories | 350 kcal |
| Protein | 6g |
| Carbohydrates | 25g |
| Fat | 28g |
| Sugar | 20g |
FAQs About San Sebastián Cheesecake
Frequently Asked Questions
- What makes San Sebastián cheesecake different from regular cheesecake?
- The burnt top and creamy, custard-like interior make it unique. It’s a dessert that focuses on simplicity but achieves complexity in flavor and texture.
- Can I make San Sebastián cheesecake in advance?
- Yes, it’s best to let the cheesecake cool completely and freeze it for several hours before serving. It’s a perfect make-ahead dessert.
- How do I prevent the cheesecake from cracking?
- Cooling the cheesecake completely in the pan and allowing it to set properly before removing it will help prevent cracking.
Conclusion
San Sebastián cheesecake is not just a dessert; it’s an experience. Whether you’re enjoying it in the charming streets of San Sebastián or baking it in your own kitchen, it brings a taste of the Basque Country right to your table. With its simple ingredients, rustic appearance, and extraordinary flavor, it’s a dessert that’s sure to become a favorite in any household. So, what are you waiting for? Try making this iconic cheesecake today and indulge in a slice of Basque heaven!
San Sebastián Cheesecake Recipe
Equipment
- 20cm (8-inch) springform pan
- Parchment paper
- Stand mixer or hand mixer
- Sifter
- Offset spatula
- Oven
Ingredients
- 650 g Cream Cheese
- 200 ml Liquid Cream
- 120 g Sugar
- 5 Eggs
- 1 Vanilla Sachet
- Lemon Peels A few
- 2 tbsp Flour
Instructions
- Step 1: Line the PanStart by lining a 20cm (8-inch) pan with two layers of parchment paper. Make sure the paper extends at least 5cm (2 inches) above the edge of the pan. This extra height ensures that the cheesecake has room to puff up while baking without any risk of overflow.
- Step 2: Preheat the OvenSet your oven to 200°C (390°F) and preheat for at least 20 minutes. For even better results, aim for a 40-minute preheat. A well-preheated oven ensures your cheesecake gets that beautiful, scorched top.
- Step 3: Whisk the Cream CheesePlace the cream cheese and sugar in the bowl of a stand mixer. Using a medium-low speed, whip them together until the sugar dissolves and the cream cheese becomes smooth and creamy.
- Step 4: Blend in the EggsAdd the eggs one at a time, making sure each is fully incorporated before adding the next. This step ensures a smooth batter and a silky texture for your cheesecake.
- Step 5: Add the Cream and VanillaPour in the room-temperature cream, along with a splash of vanilla and a few strips of fresh lemon peel. Mix on low speed until the batter is smooth and silky. Scrape the sides and bottom of the bowl to ensure everything is well incorporated.
- Step 6: Add the FlourSift the flour into the batter to eliminate any lumps. Mix on low speed until just combined. Be careful not to over-mix, as you want a smooth, velvety batter.
- Step 7: Pour and BakePour the batter into the prepared pan and smooth the top with an offset spatula. Tap the pan gently on the counter to settle the batter and eliminate air bubbles. Bake for 45-55 minutes, until the top is a rich, dark brown, and the edges are firm, but the center still has a slight jiggle.
- Step 8: Cool and FreezeOnce baked, remove the cheesecake from the oven and let it cool completely in the pan at room temperature. This cooling process allows the cheesecake to deflate and settle. Place it in the freezer for at least six hours to fully set before serving.